Creating a Collection
Your data sits at the heart of your business, and hence sits at the heart of Kinabase. Recognising the uniqueness of each business, Kinabase is designed to allow you to structure your data in whichever way suits you and your business.
Consider what data you use on a daily basis, for strategic decision making and operational oversight. Most businesses will have a lists of Companies, Contacts and Suppliers that they need to stay on top of, and many more will have Projects or Tasks that they need to assign and manage. Kinabase gives you the freedom to name and structure your datasets however you wish, whilst it fits all of your Collections together in the background.
Your Kinabase environment will be comprised of Collections, data tables that, on the surface, look and behave similarly to Spreadsheets. Collections are structured datasets that can represent anything from Contacts to Inventory.
This short video will show you how to create you first collection using our AI powered collection and field configuration tool and below we've listed the steps you can take to achieve the same results.
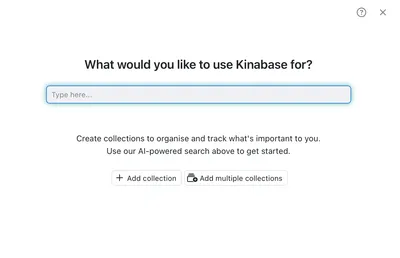
To start adding a collection, click the Add Collections button in the bottom left of the screen, you can then type in a sentence or words to describe what you want to use Kinabase for.


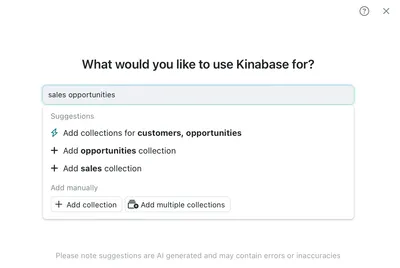
Kinabase will then suggest Collections from your text. The first recommendation is usually an AI generated suggestion. If you're happy with the AI generated recommendation, it can expedite you through collection creation. Otherwise, you can select what you need from the drop down list or add Collections manually.
You can describe your collection in the description field. Once you are happy, click Next to continue.
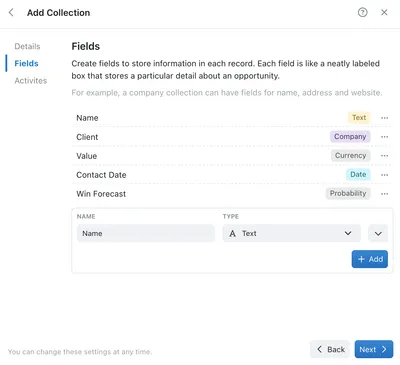
You will then be taken to the Fields screen. If you pre-generated some fields in the previous steps you will see them listed here, otherwise the fields list will be empty. Here you can create fields, add descriptions, and select data types for each.

A Field is similar to a column in a spreadsheet, and carries a Title, Description, and a Data Type (such as a date or text). When adding your new field, you'll be able to enter a name and then see a dropdown of all the different types of data that the field can hold.
Take the time create all the Fields you think you'll need. Fields can be added or edited at any, but it's best to get as close to a complete set as you can now to save effort later on. Once you're happy with your list of fields, click Next.
You will then be taken to the Activities tab, which will automatically default to Off. Enabling this allows you to record activities such as emails, phone calls or meeting notes against your collection. If you want to turn this on, just click on the blue toggle switch.
More information on how to use the Activities feature can be found in the Managing Activities support article.
Click Done and your new Collection will appear on the Sidebar. You can repeat these steps for every new Collection that you want to set up.
Adding Multiple Collections
If you've used the Generate Features tool to create several Collections at the same time, you will be shown the below screen. Click the collections you would like to keep and add the relevant fields.
You can use the Suggest fields button to generate fields with AI or add new fields to each manually. If you'd like to stop generating fields early, click Stop Suggesting. You can also delete suggested fields by clicking the ... icon next to each.
Once you're happy with the list, click Add Collections to complete this step.

The AI generator is a great way to add collections quickly. Don't worry if they're not exactly correct. Collections and fields can be modified at any time.
For further guidance on how to create, configure, and link together Collections, see the following support articles:
- Configure your Collections to learn more about different field types
- Linking Collections to learn more about linked, aggregated, and lookup fields