Expenses Setup Guide
One way in which you and your organisation can use Kinabase is to manage and automate expense submissions and reimbursement - this set up guide will describe how to create a simple expenses tracking system in Kinabase so you can get started as quickly as possible.
The expenses tracker that we will create in this guide will allow you and your colleagues to submit expenses where they will be stored in a collection as individual records. We require different views to filter active and closed expenses, and we will also need some calculated fields to quantify exactly how much each of our colleagues is owed in expenses.
To create an expenses tracker in Kinabase, we will cover Creating a Collection, Configuring Fields, and Configuring Workflows.
Kinabase is a flexible platform, so if there's anything you want to add, remove, or change for your organisation then don't hesitate to deviate from this guide!
Creating Collections and Fields
Our first step towards creating an expenses tracking system in Kinabase is to create the collection that will be used to submit, store, and monitor active and inactive expenses. There are only two collections that we need for this: an Expenses collection, and the Colleagues collection.
The Colleagues collection is created by default when you first set up Kinabase, so all we have left to do is create and configure the Expenses collection.
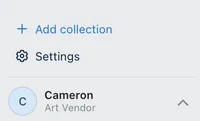
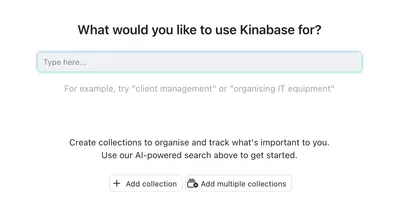
To create a new collection for Expenses, First click the Add Collection button at the bottom left of the screen, this will take you to the New Collection window. Here we will be creating a new collection manually, so select the Add Collection button near the bottom of the window.
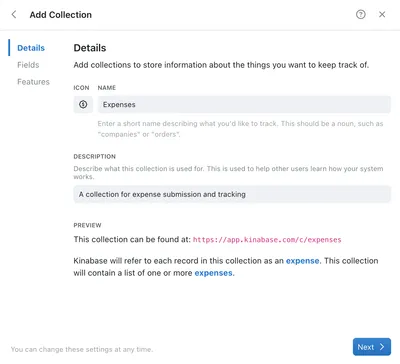
You will next be prompted to enter a title and select an icon to represent the collection you've just created - we're going to call this collection "Expenses", then we'll click Next to configure fields for this collection.
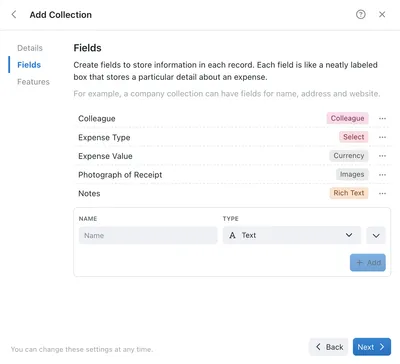
Fields represent the types of data that will be stored against each expense record. To create a new field in this collection, enter a descriptive name and select a data type from the dropdown, then click Add. You can reconfigure your fields at any point, but for now we're going to start with 5 fields to describe each expense:
- Colleague - Type: People - The name of the person submitting the expense, linked to the Colleagues collection;
- Expense Type - Type: Select - A dropdown to select the option that most closely matches each expense;
- Expense Value - Type: Currency - The value of the expense for reimbursement;
- Photograph of Receipt - Type: Images - A field against which a photograph of the expense receipt can be attached;
- Notes - Type: Rich Text - A data entry box where the user can enter some more details to describe the expense.
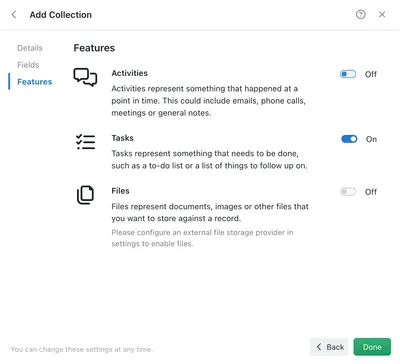
Finally we see the option to activate specific features in this collection - we will select Tasks as we want to allow users to be able to create tasks against specific expenses, and assign them to other users. Click Done to create the Expenses collection.
More detailed steps on how to create a collection can be found in the Creating a Collection support article.
Creating Workflows
Now that we have the Expenses collection and fields configured, we need a way to differentiate and track expenses through submission, approval, and reimbursement, to move each expense between these stages with one button press, and finally to restrict who is able to progress each expense record - for this we will use the Workflows feature.
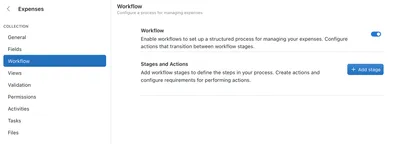
To enable Workflows for our Expenses collection:
- First navigate to the Collection Configuration page by right clicking the Expenses collection in the navigation pane then selecting Configure from the dropdown list;
- Select Workflow from the configuration page list;
- Select the Workflow toggle button to enable workflows for this collection.
From here you will be able to create workflow Stages and Actions that will be used to progress expenses between the stages.

To create a workflow stage, click the Add Stage button then enter a name and select a colour to represent this stage. The 4 stages that we will create for our expenses collection are Pending Review for newly created expenses, Rejected, Approved, and finally Reimbursed.
Now that the stages have been created, we need to create the Actions that link the stages together. When an action button is clicked, the record's workflow stage will be changed.
We want these actions to be available only to colleagues in the HR team to prevent people from approving their own expenses, and we want to request a signature from whoever marks an expense as Approved and Reimbursed.
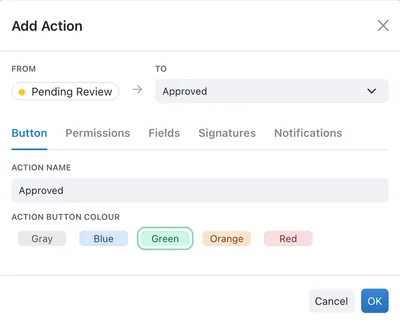
To add an action, click the Add Action underneath a stage. In the Add Action window you will be prompted to select the stage this action will trigger. In the above example we're creating the action that progresses an expense from Pending Review to Approved.
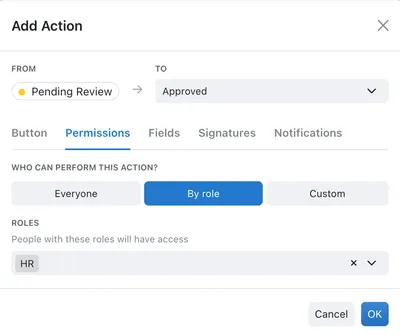
Next, we select the Permissions tab of the Add Action window. Here we can choose who has access to this action - because we only want users in the HR team to have access, we select By Role, then HR from the dropdown list. If HR does not appear, you must create the role in user settings, see more here: Managing Roles.
Repeat the above two steps for all the actions you wish to create.
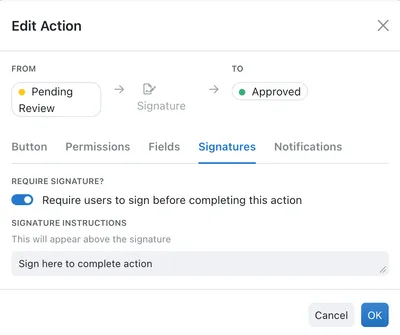
Finally, we want to require a signature from whoever is marking an expense as Approved or Reimbursed. To do this, we right click on the actions we want to change, then click Edit Action. Next navigate to the Signatures tab, then select the Require Signature? toggle switch and optionally add a description for the signature action.
Once you've created all the stages and actions, your workflows stage should look similar to the example below.

Creating Views and Setting Permissions
You and your colleagues may have a few different objectives when they come to view the Expenses collection. Whilst someone in the sales team may be coming to check on the status on their own submissions, someone your finance team may only be interested in seeing which expenses still need to be reviewed or reimbursed.
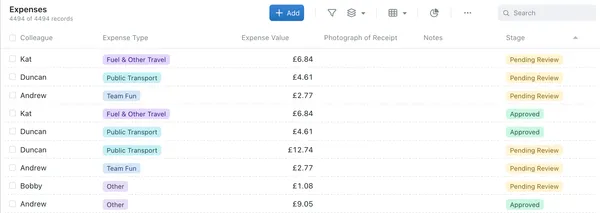
Without the ability to quickly apply filters, you and your colleagues would need to either scroll through the full list of expenses, or manually apply filters each time you open the Expenses collection. Views are pre-configured filters that can be quickly applied and swapped between from the main collection view.
For this guide, we will create three views for the Expenses collection:
- Showing only Expenses at the Rejected stage
- Showing Expenses that do not have a Food & Drink type
- Showing all Expenses, regardless of stage or type
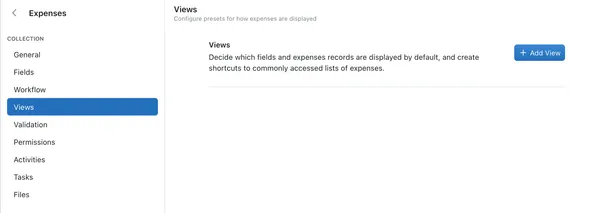
To create these views, first navigate to the Views configuration page by right clicking on the Expenses collection in the navigation pane, selecting Configure, then choosing the Views page from the list in the centre of the page.
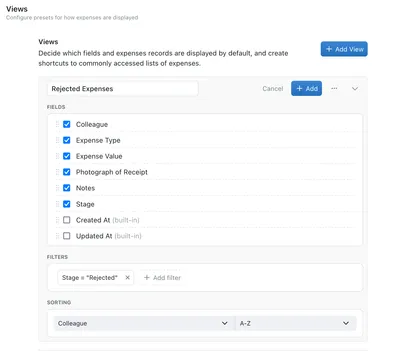
When you click Add View you'll be presented with the above screen. Here you have the option to name your view, select the fields that you wish to show or hide, configure a filter for the view, and choose how to sort the results. In the above example we've given the view a descriptive name "Rejected Expenses", and have applied a filter that only returns expenses where the stage is Rejected. Finally, the results will be sorted by the name of the colleague that submitted the expense.
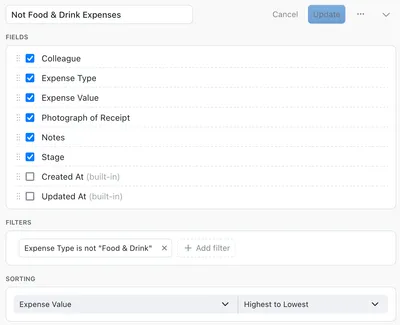
The second view is set up to include all expenses that do not have "Food & Drink" as their expense type and to sort by the value of the expense. The configuration of this view can be seen above.
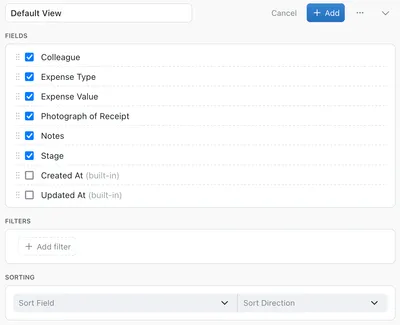
The final view is a default view that shows all expense records with no filters or sorting applied.
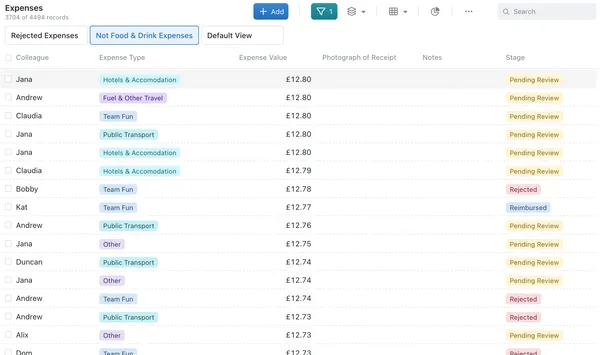
Once configured, you will see these three views as buttons when viewing the expenses collection. Quickly switch between each view, or click the filter button along the top to manually adjust the filters - note that filter changes here will not be saved.
Creating Aggregated Fields
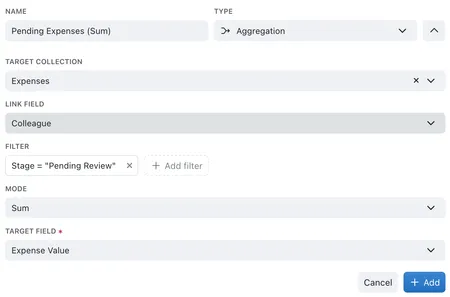
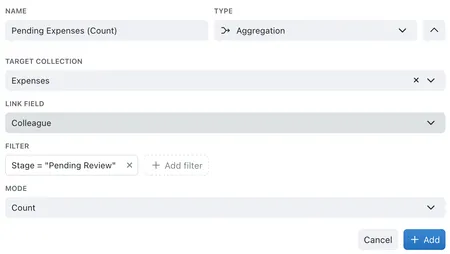
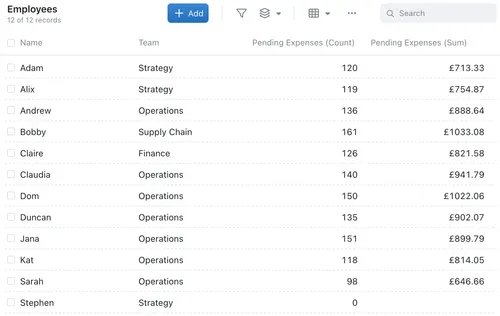
Now that we've created an Expenses collection to collect and present individual expenses, we now want a way to view total expenses submitted for each of our colleagues. To do this, we will create Aggregated Fields in our Colleagues collection to show the count and sum total of pending expenses for each colleague.
To create these aggregated fields:
- First navigate to the Collection Configuration page for your Colleagues collection by right clicking the Colleagues collection in the navigation pane, then selecting Configure from the dropdown.
- Select the Fields page, where you will see the list of fields currently configured for this collection.
- Click the Add Field button to start configuring the aggregated field
- Name your field and select the Aggregated Field option under the Computed Fields section
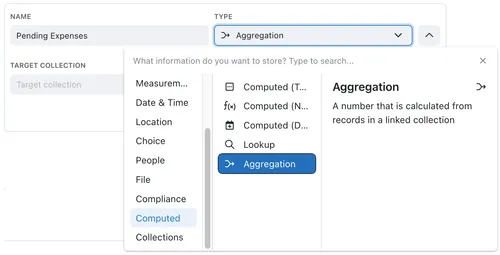
The two aggregated fields that we're making should be configured similarly to the below examples, where the Expenses collection is our linked collection, and Colleague is the linking field (meaning it's the common field between the two collections) and we're applying a filter to only compute records still Pending Review. For the Sum field, we also specify that it's the Expense Value field that we want to find the sum for.
With both fields configured and saved, return to the colleagues collection to check that they've been created correctly. If it looks similar to the below example, congratulations! Your expenses system is now set up and ready to use!
Kinabase is a flexible platform, designed to fit around you and your business's needs. Everything mentioned in this setup guide is completely configurable to your specific requirements, so don't hesitate to change or rename anything you've seen heree.
If you're having any issues with this setup guide or have a general enquiry, get in touch with our support team at support@kinabase.com, or call us on 01223 626262